How to Install or Uninstall Fonts in Windows 7
To read certain local language web contents, like local news, recipes, invitations we may have to use custom fonts, which are not available with the default installation of Windows 7. It is indeed very simple to incorporate new fonts to the Windows 7 system.
Steps to Install Fonts in Windows 7
Step 1: Login to your Windows PC as administrator and download the required fonts to your PC
Step 2: Copy the fonts (Ctrl+ C) or right click on fonts and select ‘Copy’
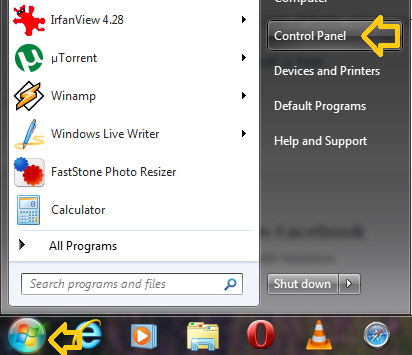
Step 3: Click on Windows start menu and then click on Control Panel
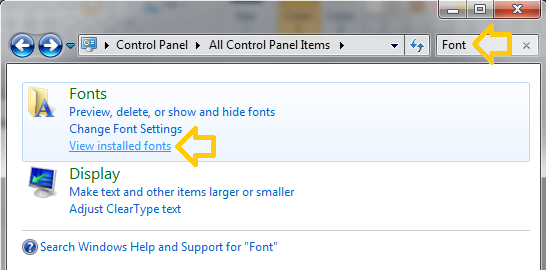
Step 4: In the control panel window, enter ‘Font’ in right top search box. You will get the allowed operations on ‘Fonts’, then click on the ‘View installed fonts’ option.
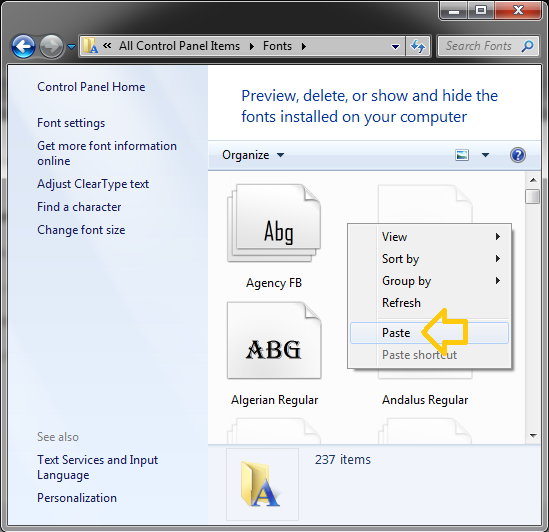
Step 5: Now you will get the list of all fonts available in your system. Now you can paste (Ctrl +V), or right click and select ‘Paste’, theose copied fonts inside the window. Alternatively you can also drag and drop new fonts that need to be installed to this window.
Done. Now you are successfully installed new fonts into your windows desktop.
Uninstall a Font from Windows 7
Step 1: Login as administrator to your Windows PC
Step 2: Follow the steps as given below to view the fonts installed on the System (Till Step 4 in Font installation section shows above).
Step 3: Now, right click on the font you want to uninstall, and select ‘Delete’ option.

Step 4: Confirm delete action by selecting ‘Yes’ from the popup dialogue.
Done, Now you successfully uninstalled the font from your System
